Not a murder
Location
Stockholm
Date
2024
Team size
3
Role
Programmer
Engine
Unreal Engine
Overview
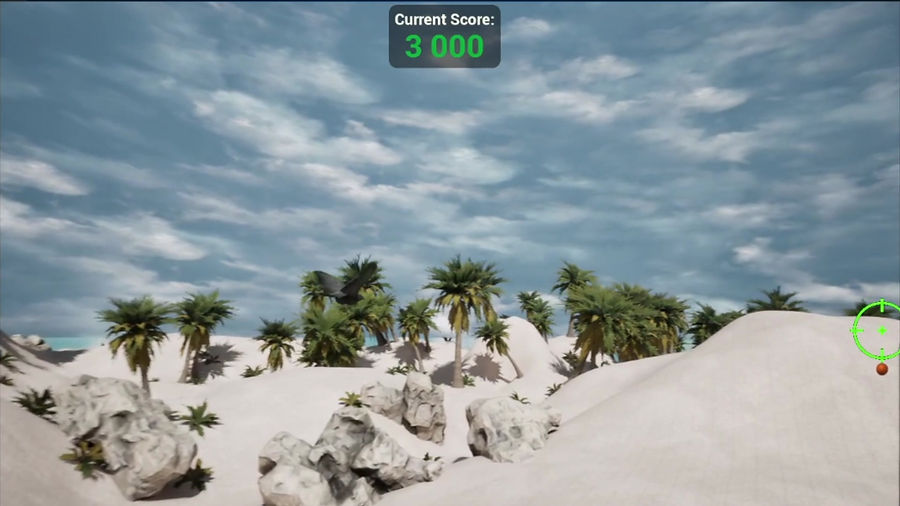
"Not a Murder" is a rail shooter game developed using Unreal Engine 5. The game leverages both Blueprints, Unreal's visual scripting language, and C++ to create a fast-paced, action-packed experience. This project was a collaborative effort, developed by a team of three: one level designer and two programmers(myself and another programmer).
We worked on this project over the summer to keep practicing our programming and game development skills. Our goal was to apply what we had learned in a practical setting, challenge ourselves with new problems, and continue honing our abilities in a creative and fun way.
Project goals
The goal was pretty simple: to create a fun rail shooting game packed with action. We wanted players to have an exciting experience as they moved through levels, dodging obstacles and shooting at enemies. We focused on making the gameplay feel fast and engaging, with easy-to-learn controls and plenty of thrilling moments. This project was all about experimenting and learning while trying to make a game that we and others would enjoy playing
Core features
During development, I worked on implementing several core features that were crucial to the gameplay experience:
Spline-based movement
The first challenge I tackled was how to move the player along the spline. Our goal was to allow the player to move while still following a predetermined spline path. Simply updating the player's location each frame to follow the spline wasn't an option, as it wouldn't allow the freedom of movement we wanted.
Initially, I attempted to make the player move up/down and left/right by applying forces in those directions. I then added a forward force using the tangent of the player's current position along the spline, allowing movement along the path. However, this approach had a significant issue: when the spline curved, the player could move too far away from the path. For example, if the player moved to the right while the spline curved to the right, the force applied to the right would end up pushing the player further from the spline path, making control difficult and inconsistent.
To solve this, I adopted a different approach. Instead of directly attaching the player to the spline, I created a parent object that followed the spline path. The player was then set as a child of this parent object. This setup allowed the player to move relative to the parent object only in two axes (up/down and left/right). By using this method, I could easily set limits on the player's movement, ensuring they stayed within bounds. This approach ensured the player's rotation remained correct, consistently aligning with the spline path while still enabling free movement up, down, left, and right.
Movement logic
The player's movement is controlled using the stickpad's X and Y values. Each of these values is multiplied by a factor that determines how much the player should move. The results are then added to their respective axes (X for left/right, Y for up/down).
To keep the player within the intended play area, these new axis values are clamped between set limits, which can be adjusted by the game designer. This ensures the player doesn't move too far in any direction.
Finally, we use a lerp function to smoothly transition the player from their current position to the desired position. Throughout this process, the player's relative location on the X-axis remains constant, keeping them a fixed distance away from the camera.


Camera Rotation and Movement
Although we wanted the player's view to always face forward along the spline's path, we also wanted to give the player a sense of control over the camera view. To achieve this, I implemented a camera rotation feature that adjusts the camera's direction based on where the player is aiming.
The camera rotates relative to the player's parent object, allowing it to always follow the spline path while still responding to player controls. This design ensures that the camera stays aligned with the direction of the spline but can tilt and rotate slightly based on the player's input.
This feature adds a layer of freedom and makes the game feel more dynamic, giving the player a sense of agency while maintaining the forward-moving perspective of a rail shooter.
Camera Rotation Logic
First, we track the current position of the cursor on both the x and y axes. To find out how far the cursor is from the center of the screen, we subtract the center position of each axis from the cursor's current position. This gives us the delta value for each axis.
Next, we convert these delta values into percentages by dividing them by the center position of each respective axis. This gives us a measure of the cursor's distance from the center in percentage terms.

We then check if these percentages exceed the limits set by the game designer for each axis. If they do, we calculate a new target rotation for the camera.

Finally, we smoothly transition (or lerp) the camera's current rotation to the new target rotation, making sure to clamp the rotation values within the limits specified by the game designer for each axis. This ensures that the camera movement remains controlled and smooth.

Updating player movement limits
Since we allowed the player to rotate the camera, we couldn't just set fixed limits for the player's movement on both the X and Y axes. When the camera rotates, the player could potentially move out of the camera's view. This made it necessary to dynamically update the player's movement limits for each axis based on the camera's rotation.
For example, if the camera rotated to the right, the movement limits would need to change to ensure that the player stays within the visible area. This means that the right limit would need to be higher than the left limit. To visualize this, imagine the player moving within a rectangle. As the camera rotates, the position and orientation of this rectangle need to be adjusted to match the camera's new angle, ensuring the player always stays within the defined area and remains visible on screen.
Updating player movement limits logic
This was a pretty scary challenge at first, and I saw it as a very difficult problem to solve. However, I started by drawing out the problem, and I quickly realized that it could be tackled using trigonometry. Since we knew the distance of the player from the camera, as well as the camera's rotation, we could use the formula:
tan(cameraRotation)=deltaFromTheCenterdistance/PlayerToCameraDistance
By applying this formula, we could calculate the distance to add to the movement limits. This approach worked for both the X and Y axes, allowing us to dynamically adjust the player's movement limits based on the camera's rotation.


Shooting Mechanic
For the shooting logic, we needed to perform a line trace that started from the center of the camera, deprojected into world space. The endpoint was calculated by deprojecting the mouse position into world space and extending it by a certain vector distance to ensure the line trace covered enough ground. We accounted for three different scenarios after performing the line trace:
Hitting an Enemy: If the line trace hit an enemy, the projectile would be fired directly at the enemy's position. The enemy would also be set as the homing target for the projectile, meaning the projectile would adjust its trajectory to ensure a higher chance of hitting the enemy.
Hitting a Non-Enemy Object: If the line trace hit something that wasn’t an enemy (like an obstacle or the ground), the projectile would be fired to the location of the line trace hit, providing a sense of realism and consistency in shooting mechanics.
Hitting Nothing: If the line trace didn’t hit anything, the projectile would be fired towards the end point of the line trace. This ensured that even if no specific target was hit, the projectile would travel in the direction the player was aiming.
These scenarios ensured that the cursor and shooting were accurate, making sure that the projectiles would be shot precisely where the player was aiming. This design provided intuitive and responsive shooting mechanics, essential for a rail shooter game where fast-paced action and precision are key.


Aim Assist
During early playtests, we quickly realized that hitting enemies was quite difficult due to the constant movement of the player, camera, and enemies. To address this, we implemented an aim assist system. Our approach was to decrease the cursor sensitivity to one-third of its original value when hovering over an enemy, making it easier for players to aim. Additionally, we used Unreal's homing projectile feature, which adjusts a projectile's trajectory to follow a target, increasing the chances of hitting it.
To give players visual feedback that they could shoot an enemy, we made the cursor change its appearance when targeting an enemy. This visual cue helped players quickly identify when an enemy was in range and could be hit, enhancing the gameplay experience.


Secondary weapon visual feedback
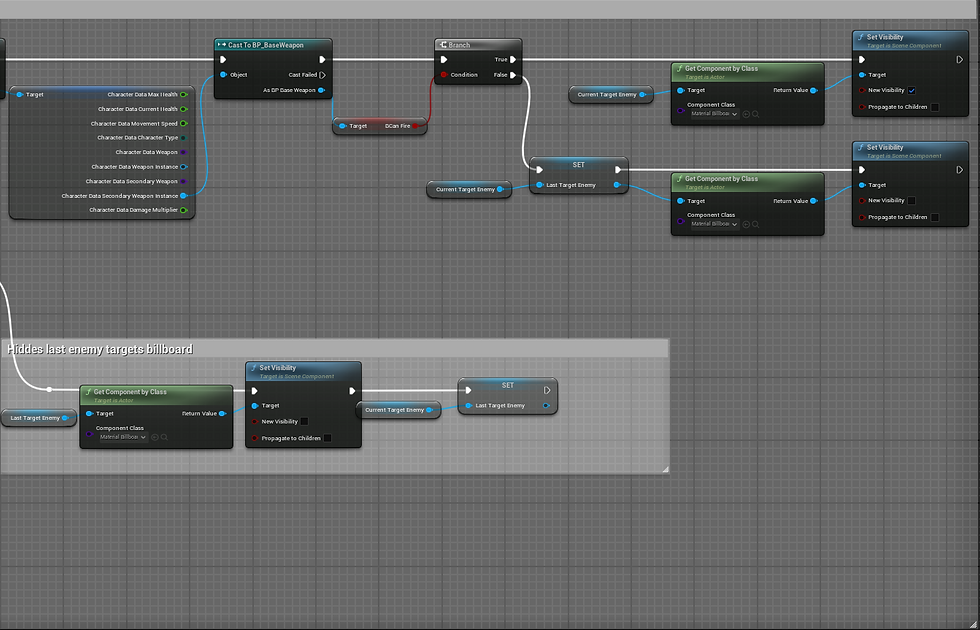
We also implemented a secondary weapon that dealt area damage, which required providing visual feedback to the player to indicate when they could use this alternate projectile effectively. Additionally, we needed to show which enemy was the current target of the alternate projectile. To achieve this, we used billboards, which are images or sprites that always face the camera.
Each enemy had a billboard placed in front of them, and when the player's sweep trace hit an enemy, that enemy's billboard would become visible. This allowed the player to know which enemy was the current target for the alternate fire, making it easier to aim and use the area damage weapon strategically. This visual feedback ensured that players could quickly understand and react to combat situations, enhancing the overall gameplay experience.


Enemy Shooting
Initially, we thought that making enemies shoot at the player would be simple. We assumed we only needed the player’s position to perform a line trace and deal damage directly. However, the game designer wanted enemies to shoot projectiles that the player could dodge, which made things more complex.
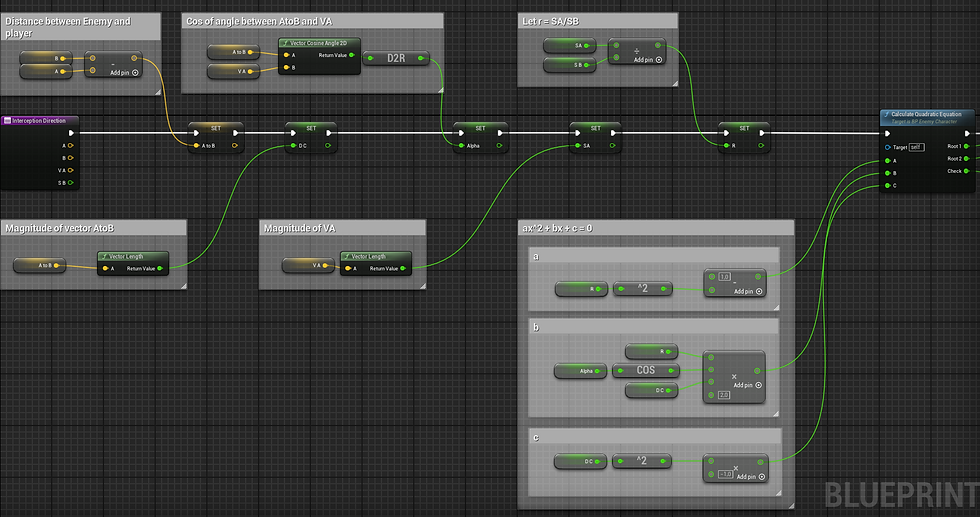
After doing some research, I discovered that we could solve this problem using mathematics, specifically the law of cosines. The goal was to find the intersection point where the player and the enemy projectile would meet. This required predicting the player's future position and timing the projectile's shot accurately.
I found a video online explaining this concept, which helped me understand how to approach it. However, rather than just copying the solution, I wanted to fully grasp the idea. So, I drew diagrams and studied the concept to understand how the calculations worked.
Eventually, I implemented this logic using Unreal Engine's Blueprints. To make the enemy projectiles even more effective, I applied a homing function, which allowed the projectiles to adjust their trajectory slightly, making them more likely to hit the player. This added a more dynamic and challenging element to the enemy attacks.


Lessons Learned
Working on "Not a Murder" was an incredible learning experience. I gained valuable insights into various aspects of game development, particularly using Unreal Engine 5. Implementing player movement along a spline taught me about handling complex movement systems and the importance of having adaptable and flexible approaches. Developing shooting mechanics and aim assist deepened my understanding of collision detection, vector math, and how to create responsive and intuitive controls. Additionally, implementing enemy AI and predictive shooting made me realize the importance of mathematics in game development, especially when dealing with dynamic interactions and real-time calculations. Overall, this project has significantly improved my problem-solving skills and solidified my knowledge of both Blueprints and C++, preparing me for future challenges in game development.